How to Crochet a Brim on a Beanie
**You can purchase an INEXPENSIVE AD-FREE PDF of this pattern onEtsyHERE and onLoveCrochetHERE ! This beautifully formatted PDF includes the pattern for the Double Brim Ribbed Crochet Beanie, Snow Puff Ribbed Beanie, and Snow Puff Ribbed Scarf as well as the step-by-step pictures. It is a total of 10 pages including the cover page!
Last winter, I designed a luxurious Snow Puff Ribbed Beanie & Scarf by holding two strands of New Basic 175 (worsted weight level 4) yarn together to create a gorgeous marled look. I love working half double crochets in the third loop to achieve different effects, and this beanie has such a modern look with its ribbing and double brim. I wanted to try making a worsted weight version using only one strand of yarn for this season!
![]()
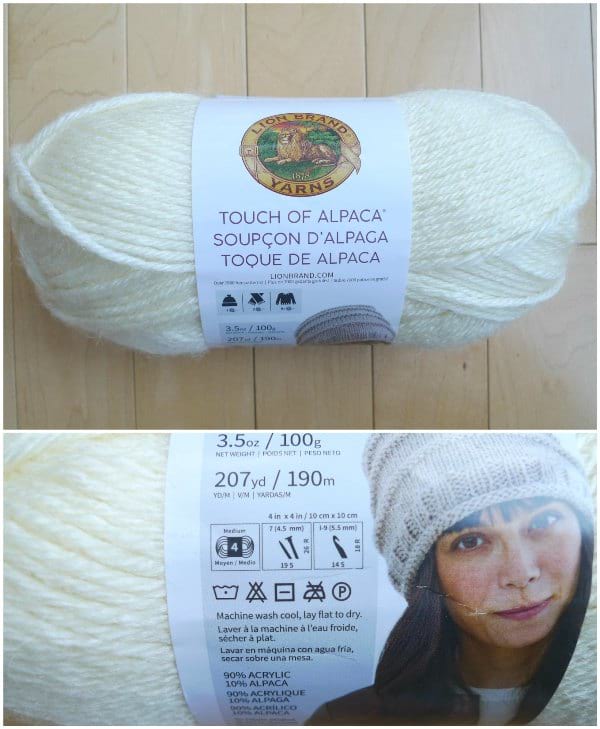
I decided to use "Touch of Alpaca" in "Cream" as it is a classic and neutral color. This yarn is a medium level 4 yarn that is 90% acrylic and 10% alpaca, and you will need just over one skein of yarn to crochet your hat.
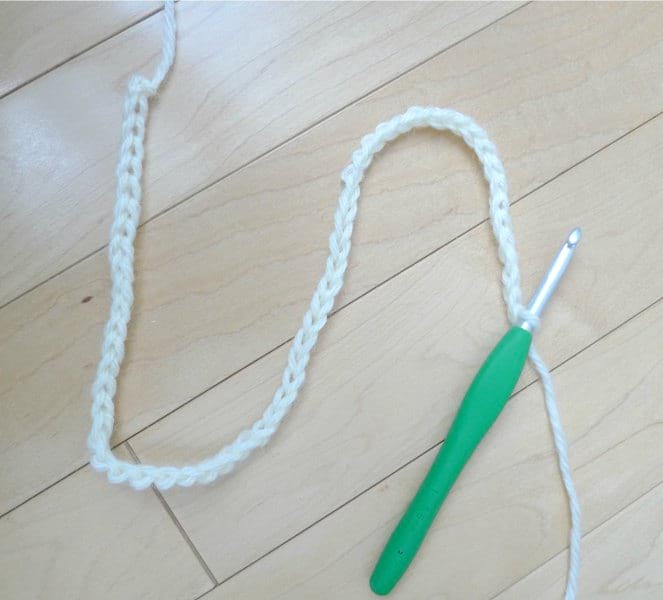
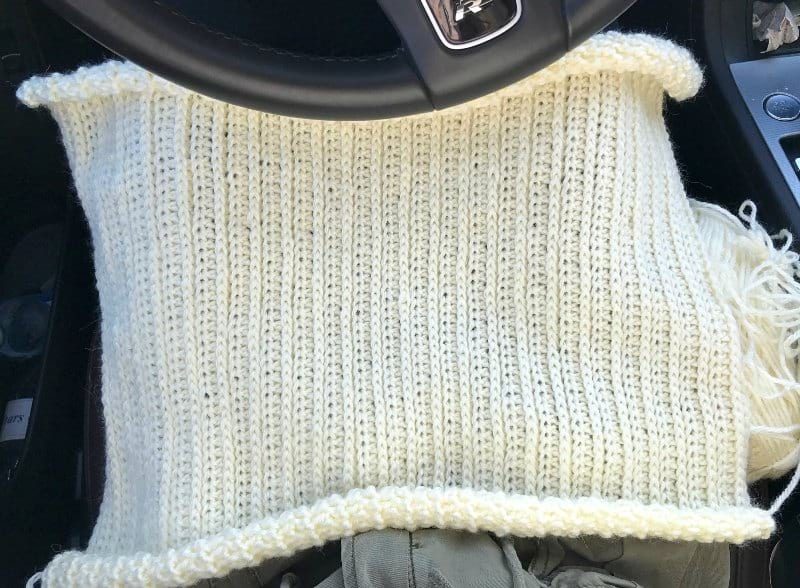
I chained 61 stitches with my 5.5 Clover Amour hook.
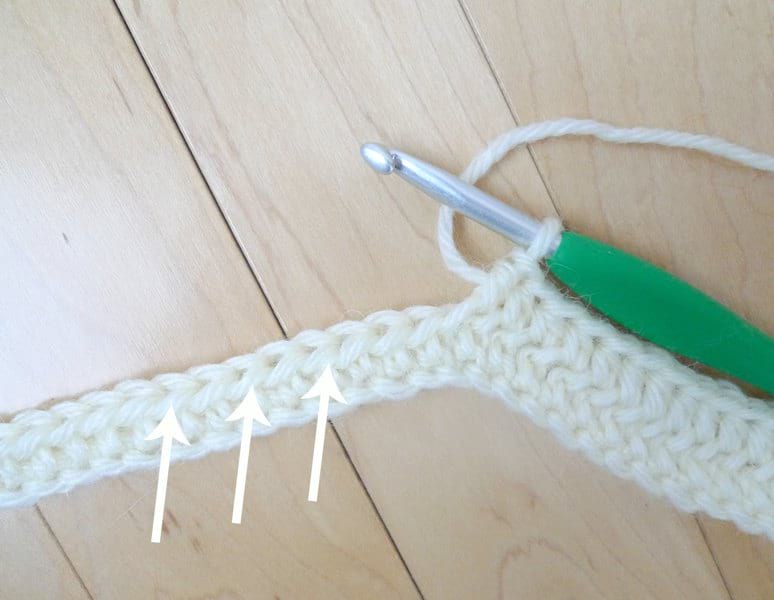
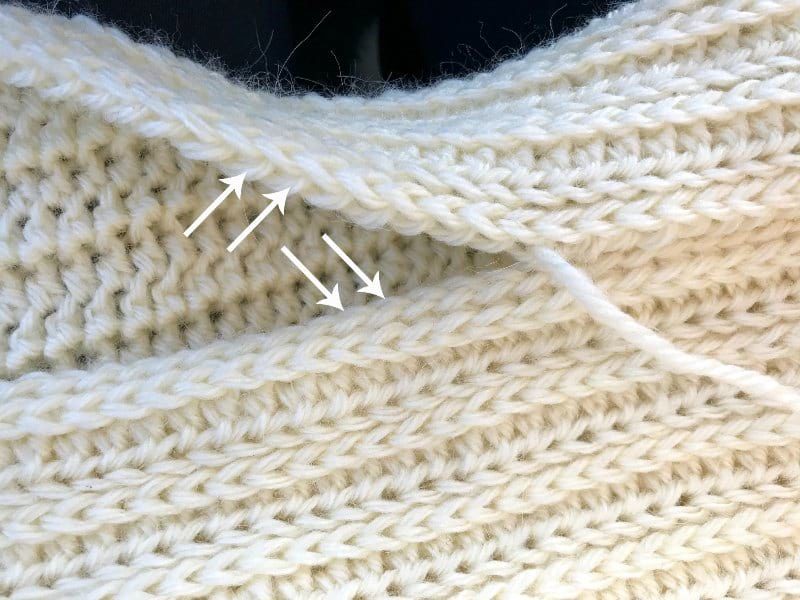
When have double crochets have been worked, three loops are created: the front loops, back loops, and third loops. After working one row of half double crochets, I worked half double crochets in the third loops across as indicated by the arrows.
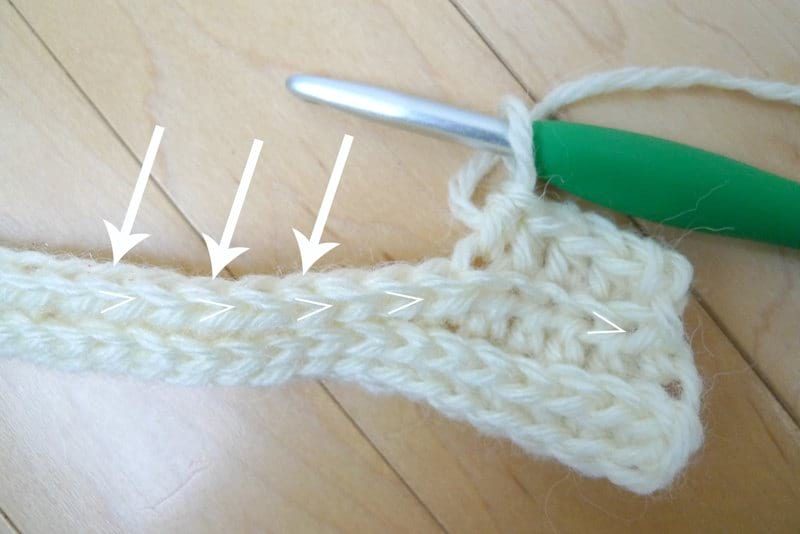
In the following row, I worked half double crochets in the back loops only, thereby pushing the beautiful V's forward as indicated in the picture below.
After completing 47 rows of alternating half double crochets in the third loop and back loop, my rectangle was complete. Here is my completed rectangle in the car as I was waiting to pick up Myla from school!
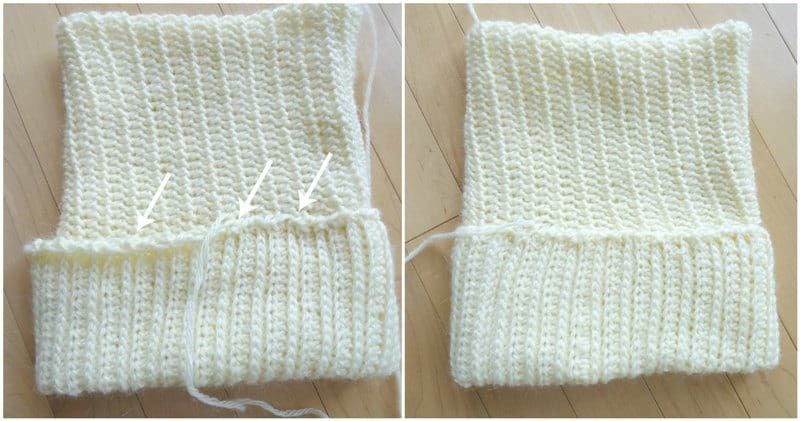
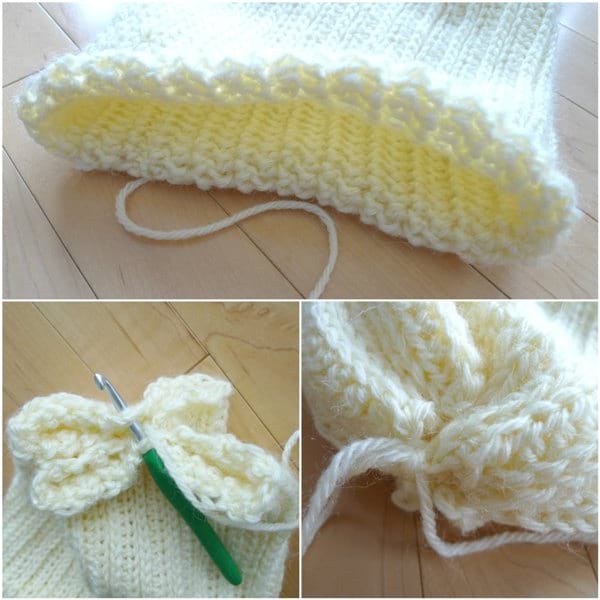
I then seamed the ends of the rectangle together by whip stitching the back loops of one row to the third loops of the other row.
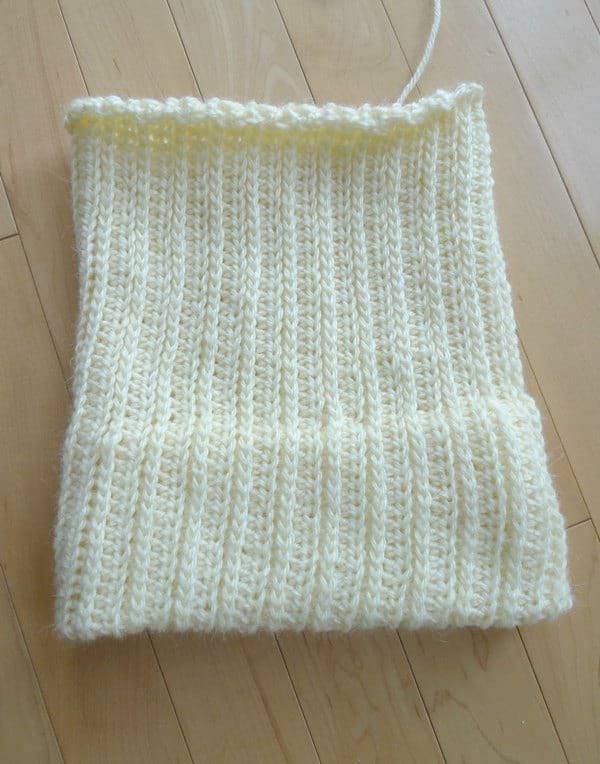
Next, I inverted the tube so the wrong side was facing me. The wrong side looks very different compared to the ribbing of the right side, doesn't it? I flipped the bottom of the tube up to create a double brim (mine measured about 4″).

I sewed the double brim into place by whip stitching the edge of the brim to the body of the hat. Note that if you want the "stockinette-inspired V stitches" facing upwards, ensure that they are facing downwards when you are sewing the double brim into place on the wrong side. Try to pick up stitches close to the surface of the wrong side of the body (rather than going through all the way to the other side) when seaming the double brim in place to prevent the seam from being visible on the right side! Try your best to also have the ribbing lines go straight upwards rather than curving sideways diagonally so that the hat is not twisting when you seam the double brim into place.
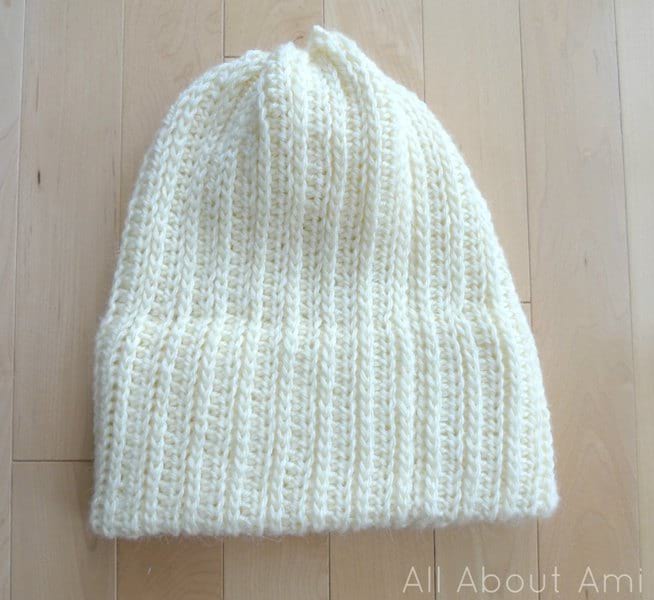
Here is my beanie with the right side facing outwards with the double brim sewn into place. Doesn't it look so thick and warm? Double brims are so cozy!
To close up the opening at the top of the hat, I single crocheted opposite ends together until the opening was completely closed up.
Here is my Double Brim Ribbed Crochet Beanie! I later opted to add a faux fur pom pom and an ultraleather garment tag for some finishing touches!
Below you can watch the making of the "Snow Puff Ribbed Beanie" which uses the exact same technique and construction except two strands of yarn are held together. In the video, you can see me demonstrate: half double crocheting in the third and back loops, seaming the rectangle together, seaming the double brim into place, and closing up the top of the hat by single crocheting opposite ends together:
***************************
Here is the free pattern for the Double Brim Ribbed Crochet Beanie:
![]()
Materials:
- Touch of Alpaca (worsted weight level 4 yarn) in "Cream", 114 grams
- 5.5 mm Clover Amour Crochet Hook
- Clover lock ring stitch markers
- Yarn needle
- Optional: pom pom – yarn pom pom (Clover pom pom maker) or faux fur pom pom (similar HERE )
- Ultraleather label by BrickBubble
Notes:
- A beautiful ribbed pattern is created by working half double crochets in the third and back loops.
- This ribbing has a tendency to curl, but all the edges will be seamed, so the resultant hat will not have any curling.
- A rectangle is formed by working in turned rows.
- The rectangle is seamed along the sides to create a tube.
- A double brim is created by folding the bottom of the tube upon itself and sewing in place.
- The top of the hat is closed up by single crocheting opposite ends together.
- To make this beanie smaller in circumference, decrease the number of rows of the rectangle (i.e. less than 47 rows)
- To make this beanie larger in circumference, increase the number of rows of the rectangle (i.e. more than 47 rows).
- To make the beanie slouchier, increase the number of initial chains (i.e. more than 61 initial chains).
- To make the beanie less slouchy, decrease the number of initial chains (i.e. less than 61 chains).
- To make a thicker double brim, fold the bottom of the tube more.
Gauge: 15 hdc and 11 rows = 4″
Ribbed Rectangle:
Ch 61
Row 1: Hdc 1 in 2nd chain from hook and across. (60 sts)
R2: Chain 1, turn. Hdc in third loops across. (60 sts)
R3: Chain 1, turn. Hdc in back loops across. (60 sts)
R4-47 (or until desired width): Repeat Rows 2-3.
Fasten off and leave long end for sewing. Seam ends of rectangle together by whip stitching back loops of one row to third loops of the other row.
Invert tube created so wrong side is facing you. Flip bottom of tube up to create double brim (mine measured about 4″). Sew double brim into place by whip stitching edge of brim to the body of the hat. If you want your final hat to have the "stockinette-inspired V stitches" facing upwards, ensure that they are facing downwards when you are sewing the double brim into place on the wrong side. Try to pick up stitches close to the surface of the wrong side of the body (rather than going through all the way to the other side) when seaming the double brim in place to prevent the seam from being visible on the right side! Try your best to also have the ribbing lines go straight upwards rather than curving sideways diagonally so that the hat is not twisting when you seam the double brim into place.
Flip hat so that the right side is facing outwards. Close up top of hat by single crocheting opposite ends together until beanie is completely closed up. Fasten off and weave in end. Add a faux fur pom pom or yarn pom pom ontop.
Finished Dimensions: 10″ tall, 9″ wide (when flat), 20″ in circumference
************************
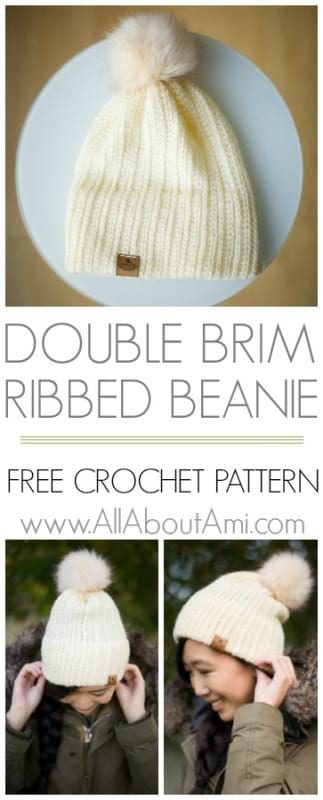
The Double Brim Ribbed Crochet Beanie is such a beautiful and luxurious hat!
![]()
It feels extra snug and secure with the double brim as it does not fall off easily and provides great warmth for the head!
![]()
I think this beanie has such a modern and sleek look with the ribbing and almost-stockinette look to the stitches. If you love the look of knitted hats but don't know how to knit, give this hat a go!
![]()
It is so tempting to crochet a Double Brim Ribbed Beanie in every color! I personally love this neutral beige color as it matches with all my jackets, and the faux fur pom pom matches so well. I think colorful hats with white pom poms would be bold and striking beanies for the fall and winter too!
![]()
Enjoy crocheting your own beanies, everyone! Don't forget to check out the "Snow Puff Ribbed Beanie" and "Snow Puff Ribbed Scarf" if you love this look and want to try making a bulkier version by holding two strands of worsted weight yarn together (works up more quickly too). All three designs can be found in the same ad-free PDF available in my Etsy shop HERE and on Craftsy HERE ! Matching sets are so much fun! You can subscribe to my e-mail newsletter HERE as you'll get updates whenever I post a new design, as well as tips and tricks and sometimes freebies as well! You can pin the below image to remind yourself of this beanie design if you want to use up some worsted weight yarn in your stash! Happy crocheting, everyone!
{Thank you to Lion Brand Yarnfor providing the yarn for this design!}
This pattern is an original pattern by Stephanie Lau of All About Ami. Please do not claim this pattern as your own. If you wish to share this pattern, you may link to this pattern but please do not reprint it on your site. You may keep a copy for your own personal use but please DO NOT sell the pattern or distribute it.
You may sell products made from this pattern but please clearly credit the design to me, Stephanie Lau of All About Ami, and provide a link to my blog www.AllAboutAmi.com. Permission is NOT granted for mass production or factory manufacturing of any kind. Thank you for being respectful and for your understanding!
How to Crochet a Brim on a Beanie
Source: https://www.allaboutami.com/double-brim-ribbed-crochet-beanie/